Marshmallows
I know you can do this.
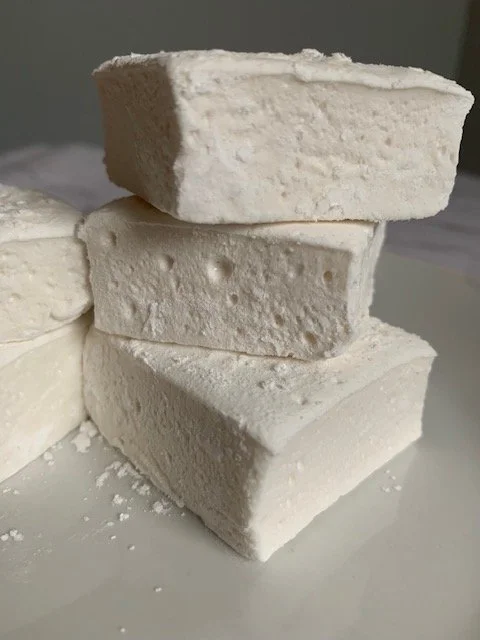
The elusive marshmallow seems like a daunting candy to make, but if you follow a few specific steps and are ready to get a little sticky, you will be rewarded with soft, pillowy marshmallows that you can proudly say that you made yourself. Homemade marshmallows are not only delicious, they have this amazing melting quality to them. They become so luscious and gooey when warmed up, you will rethink the store bought version. Ready to try making marshmallows? Sure you are!
Ingredients explained:
Gelatin - Gelatin gives the marshmallow that chewy, gummy texture we all know and love. If you really do not want to use gelatin, You can use agar agar, but the consistency may not be the same. It would probably be best to find a vegan marshmallow recipe so you can get the best results.
Water - Water is doing two things in this recipe. 1/2 of the water will be used to bloom the gelatin. This helps the gelatin disperse throughout the marshmallow evenly. This works best when the water is cold. The other half of the water is used in the sugar and corn syrup mixture to help the sugar melt.
Sugar - White granulated sugar is used for the base of this recipe and also provides that signature sweetness of this candy.
Light corn syrup - This helps against crystallization of sugar. If you are really, really against corn syrup, you can give it a go with 2 cups of sugar and add either 1 tsp of lemon juice or cream of tartar along with 1/2 cup of water. The acid will help fight crystallization, but take every precaution you can because it is not foolproof! Also, corn syrup actually cuts the sweetness of sugar, so if you are just using plain sugar, your marshmallows will be sweeter.
Vanilla - I like to add at least a tablespoon to really amp up the vanilla flavour. For best results, use pure vanilla.
Salt - Helps to balance the sweetness.
Icing sugar and corn starch mixture - Roll the marshmallows in this mixture so they don’t stick together.
Tools required:
9 x 13 or 8 x 8 glass pan - If you’d like a thinner marshmallow or are making shapes with cookie cutters, then use the 9 x 13 pan. If you’d like a thick marshmallow, then use the square pan. Preferably, use a glass dish as sometimes a metal pan can transfer a metal taste to the marshmallow.
Bowl & mixer - Marshmallows are formed by aeration, so a mixer is required. I recommend a stand mixer with the whisk attachment because of the intensity and duration that you need to whip these at, but a handheld mixer will work, it just may take a little longer.
Small or medium heavy copper bottomed pan - This pan will be used to cook the sugar and corn syrup. A heavy copper bottom is recommended so the heat disperses evenly and the sugar doesn’t burn.
Candy thermometer - You may be able to get away without, but it will be much more stressful! I highly recommend using a candy thermometer for this recipe so that you can get the proper consistency for your marshmallows.
Spatula - spray with cooking oil or use some other type of fat when using this utensil so it doesn’t stick!
Knife, cookie cutter, bench scraper, or scissors - Something to cut the marshmallows up. You’ll also need to grease these up to prevent sticking.
The recipe
Marshmallows
Ingredients
3 Tbsp (3 packets) gelatin
1 cup cold water, divided
1 1/2 cups sugar
2/3 cup light corn syrup
1 Tbsp vanilla
1/4 tsp salt
1/2 cup icing sugar
1/2 cup corn starch
Directions
Bloom the gelatin. In your mixing bowl, mix together the gelatin and 1/2 cup of cold water. Set aside.
Prepare the pan. Mix icing sugar and corn starch together in a small bowl. Grease a 8 x 8 or 9 x 13 glass pan, I like to use coconut oil as a hard fat seems to work better than a liquid fat to prevent sticking. Coat the pan in the icing sugar and corn starch mixture. Save the remainder of the mixture for later.
Prepare the sugar mixture. In a saucepan, mix together sugar, corn syrup and 1/2 cup of water and place on low heat. Stir frequently until the sugar granules have melted. You’ll know they are melted when you cannot feel sugar grains on the bottom of the pan. Once the sugar has melted, increase the heat to medium/high. Insert the candy thermometer to the side of the pan and let it reach 240F (soft ball). This will take about 5 minutes, so stay close and watch your thermometer. Take off the heat and let it sit for at 5 minutes to cool down. The temperature will rise a bit while it sits in the hot pan and that’s ok!
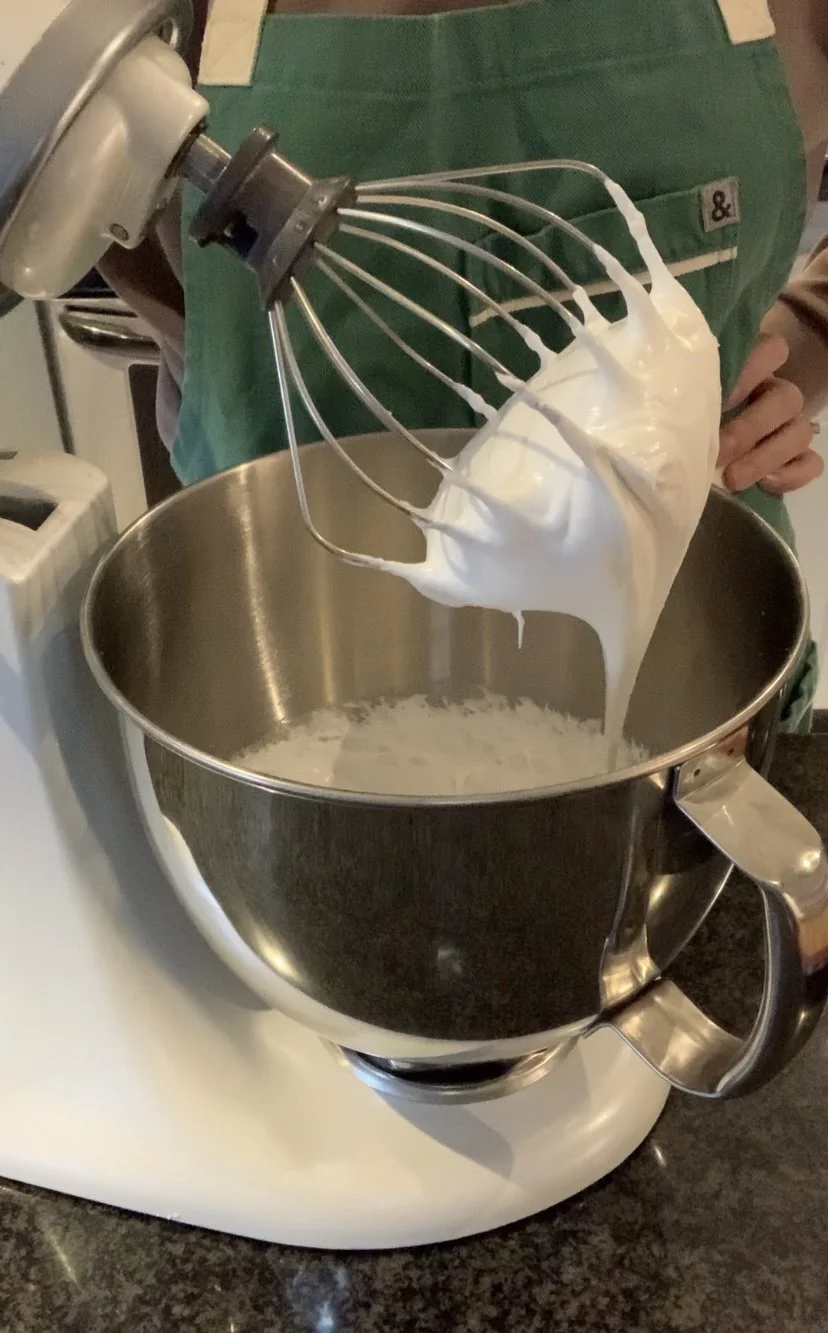
Aerate to form marshmallows. Once the mixture has cooled, turn your stand mixer on low and slowly stream in the sugar. I like to let the sugar hit the side of the bowl first, so that it has more of an opportunity to cool before it hits the gelatin. Once all of the sugar has been streamed in, add the vanilla and sugar then turn the mixer up to medium/high for 8-12 minutes, or until you notice the mixture starts to pull away from the bowl. There’s a bit of a sweet spot for the perfect marshmallow, the peaks should not be too stiff, but also should not be too soft.
Stiff-ish peaks is what you are going for. Marshmallows are surprisingly forgiving. The texture may not be ideal if you under or over whip, but they will still taste amazing and still be better than anything you buy in the store.
5. Spray a spatula with non-stick spray and then spread into the prepared pan. Let the marshmallows set at least 6 hours, or overnight at room temperature. Do not put in the fridge or freezer.
Ready to set in this pan. Let the marshmallows set at room temperature. The top will become less sticky as it sets, but don’t be fooled, they are still very very sticky!
6. Cut the marshmallows. Once the marshmallows have set, sprinkle your work surface with icing sugar/cornstarch and then turn the marshmallows out onto this surface. Spray whatever you are using to cut the marshmallows with non-stick cooking spray and then cut. Roll the marshmallows in the icing sugar and cornstarch mixture so they are no longer sticky.
Store in an air tight container at room temperature. Lasts several weeks. If you would like to try freezing, they won’t fully freeze, but this actually tastes quite good too!
Hey, I’m Kim!
After a lot of practice (and a few sticky disasters), I’ve crafted a delicious selection of lollies and mastered a ton of candy making tips to share with you—lump free. (You’re welcome.)


